Administration / User Maintenance / User Defined Field / UDF Definition
UDF Definition
Users can create new UDF. Users can edit and delete existing UDF/s. Users can also create numeric and alphanumeric UDF/s.
Navigation: Administration → User Maintenance → User Defined Field → UDF Definition
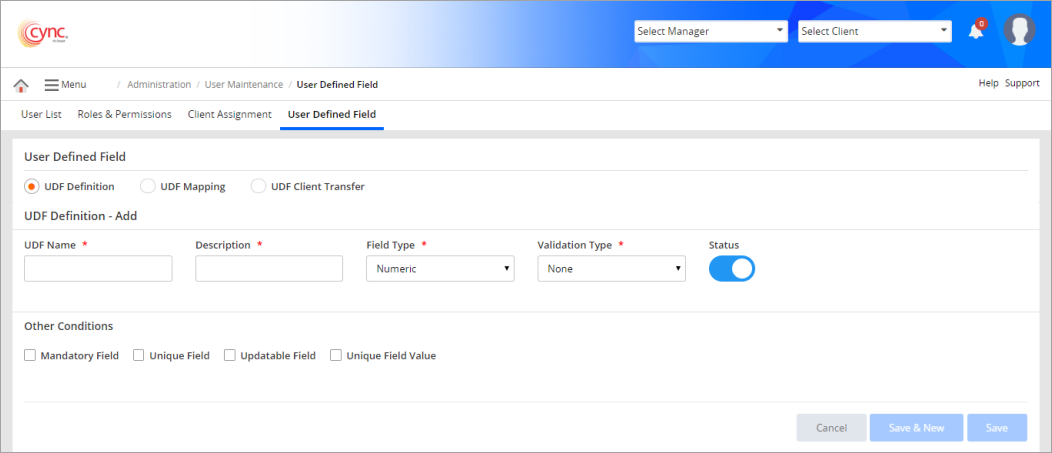
![]() An Administrator can define the UDF fields at the bank level. Any other user, such as Executive Manager/Portfolio Manager can use the defined UDFs in the relevant pages.
An Administrator can define the UDF fields at the bank level. Any other user, such as Executive Manager/Portfolio Manager can use the defined UDFs in the relevant pages.
Refer to the screenshot:
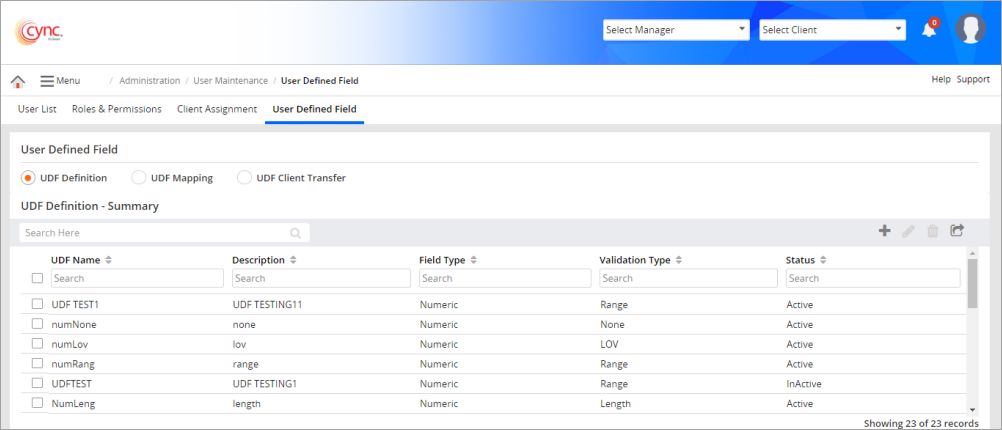
Fields and Descriptions
|
Fields |
Descriptions |
|
UDF Name |
Specifies the name of the UDF. This field can be alphabetical. |
|
Description |
Specifies the description of the UDF. This is text field. |
|
Field Type |
Specifies the field type, such as numeric, alphanumeric and date. |
|
Validation Type |
Specifies the range of the UDF, such as range, length, LOV, none, greater than or less than. |
|
Status |
Specifies the status of the UDF, such as active or inactive. |
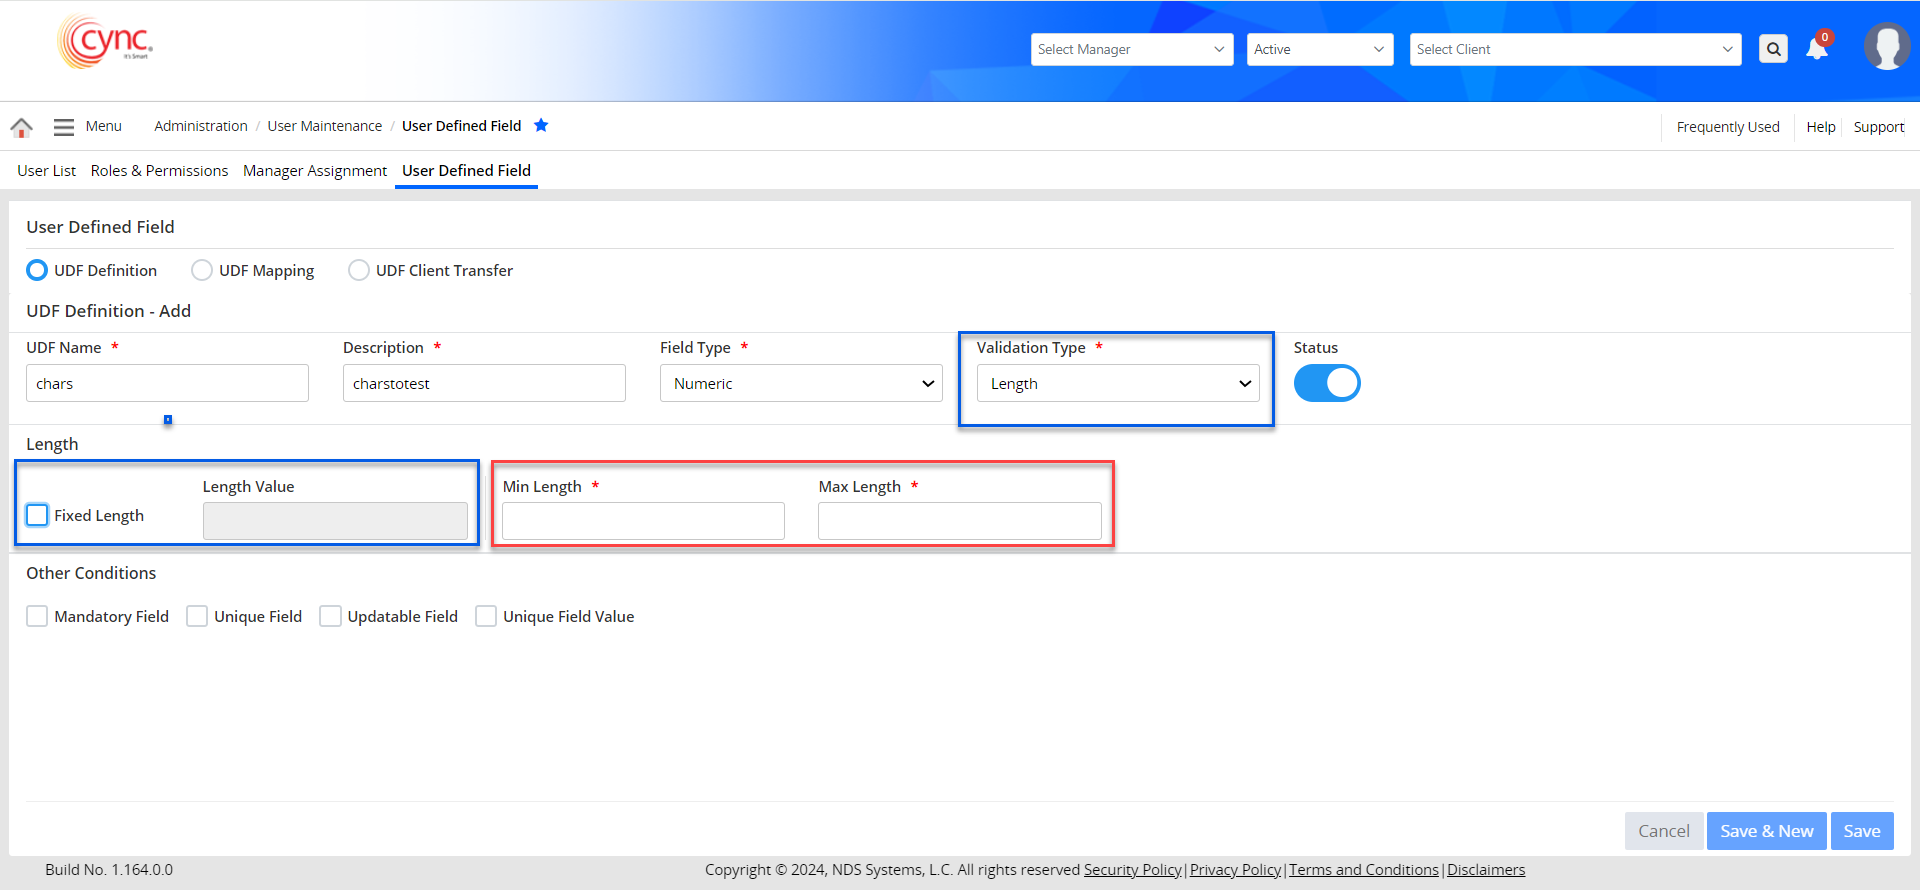
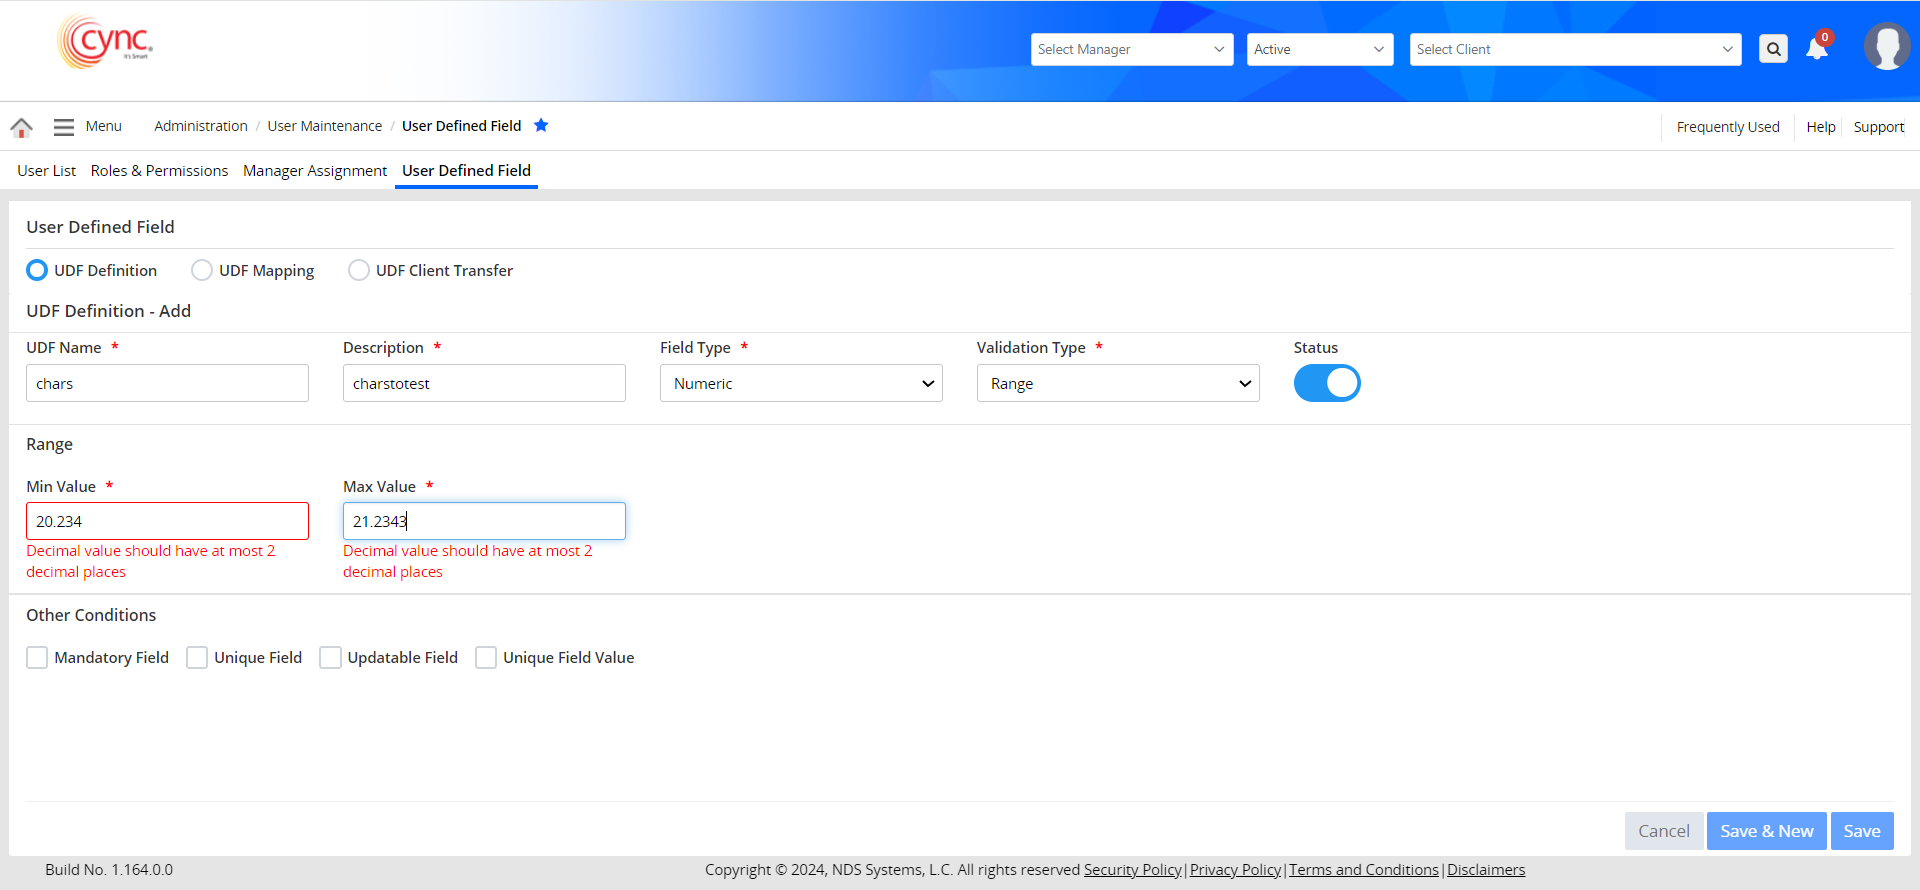
Validation Type:
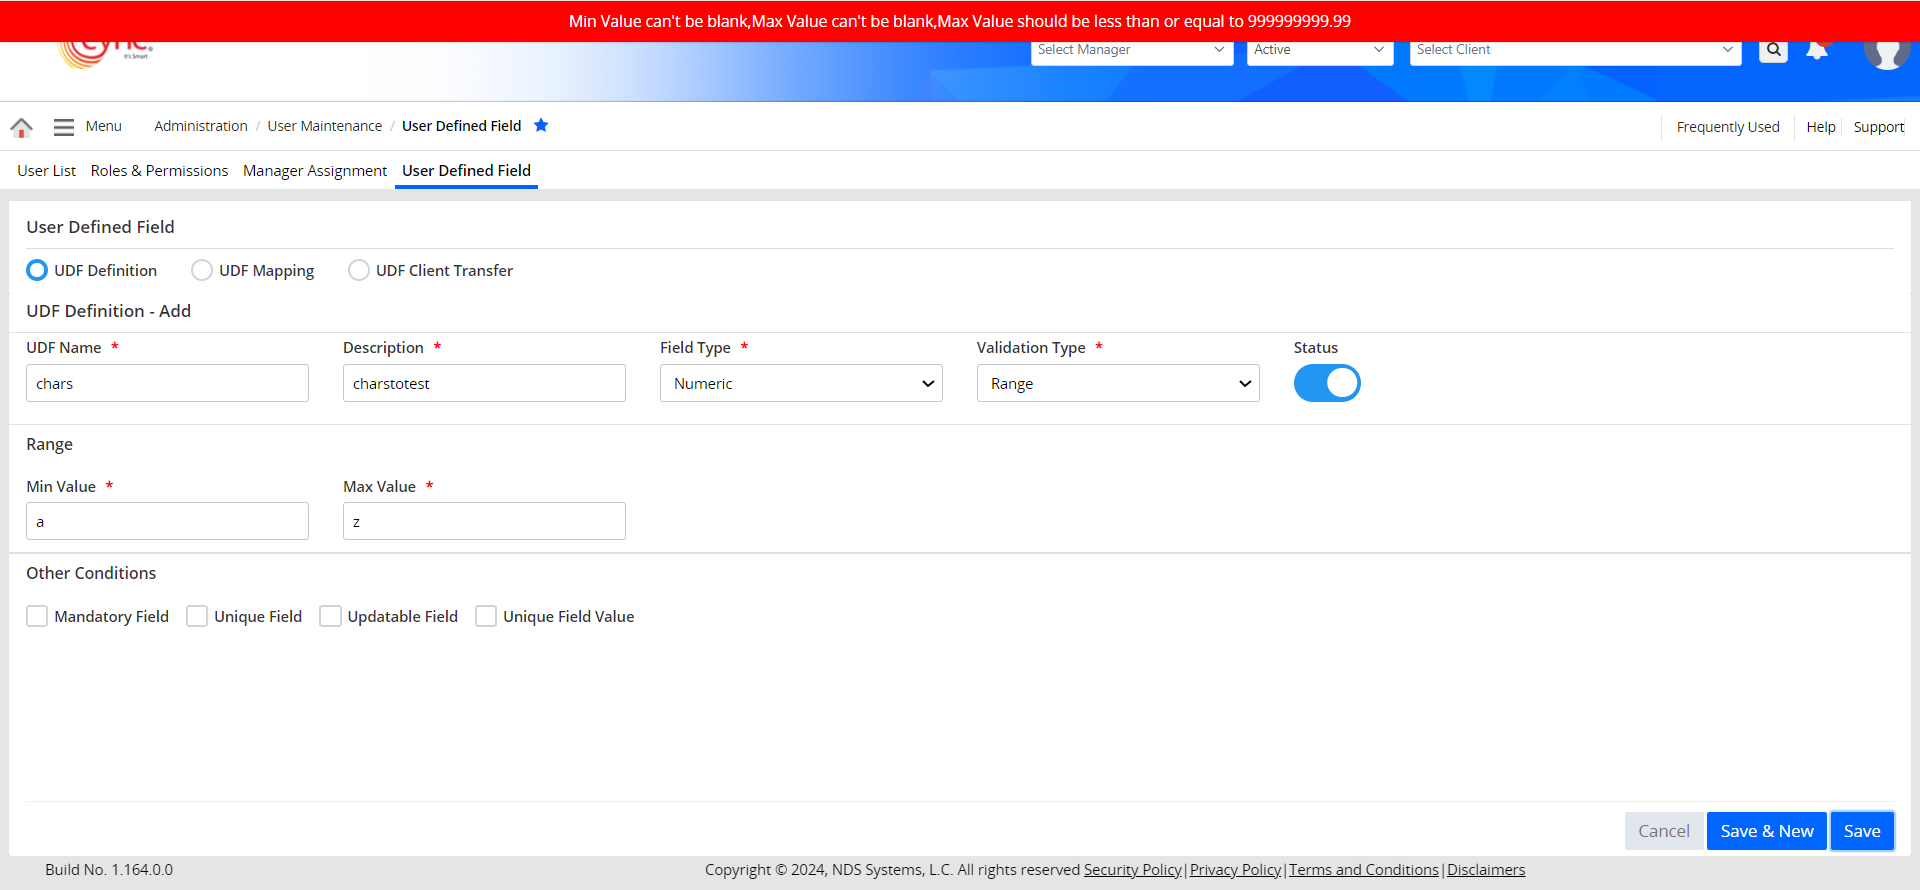
 The numeric values can have decimal precision with up to 2 decimal places. Any numeric values with more than 2 decimal places will immediately gives a field validation error.
Refer to the screenshot:
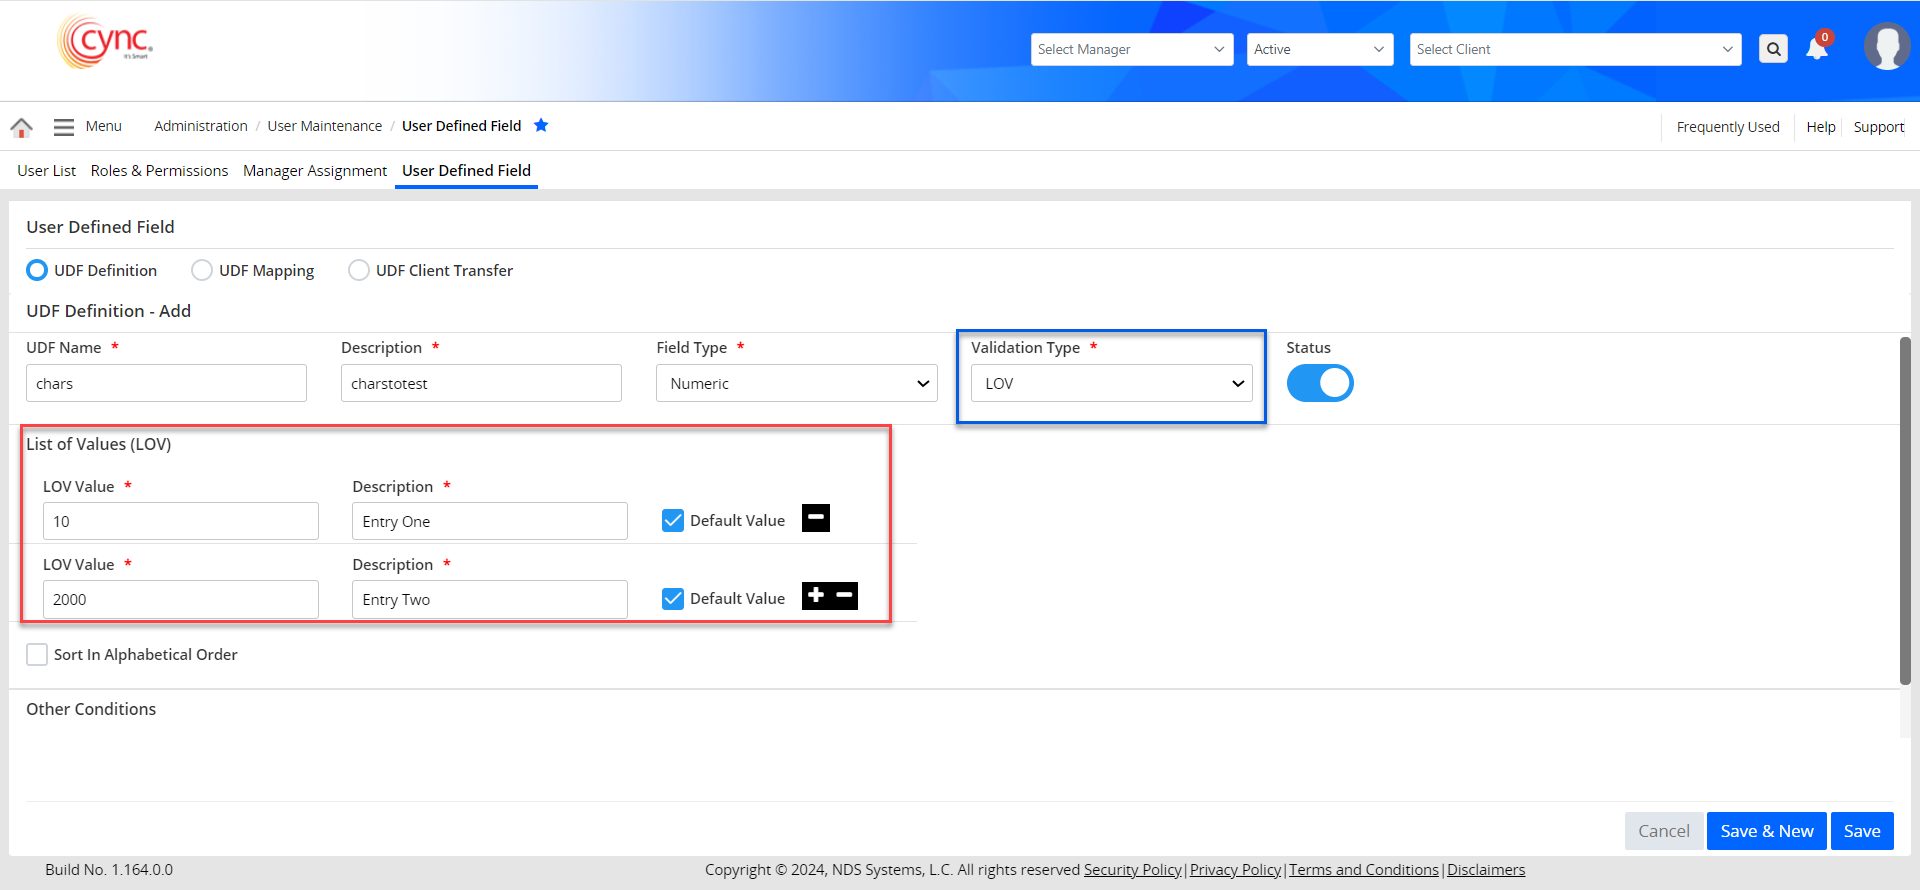
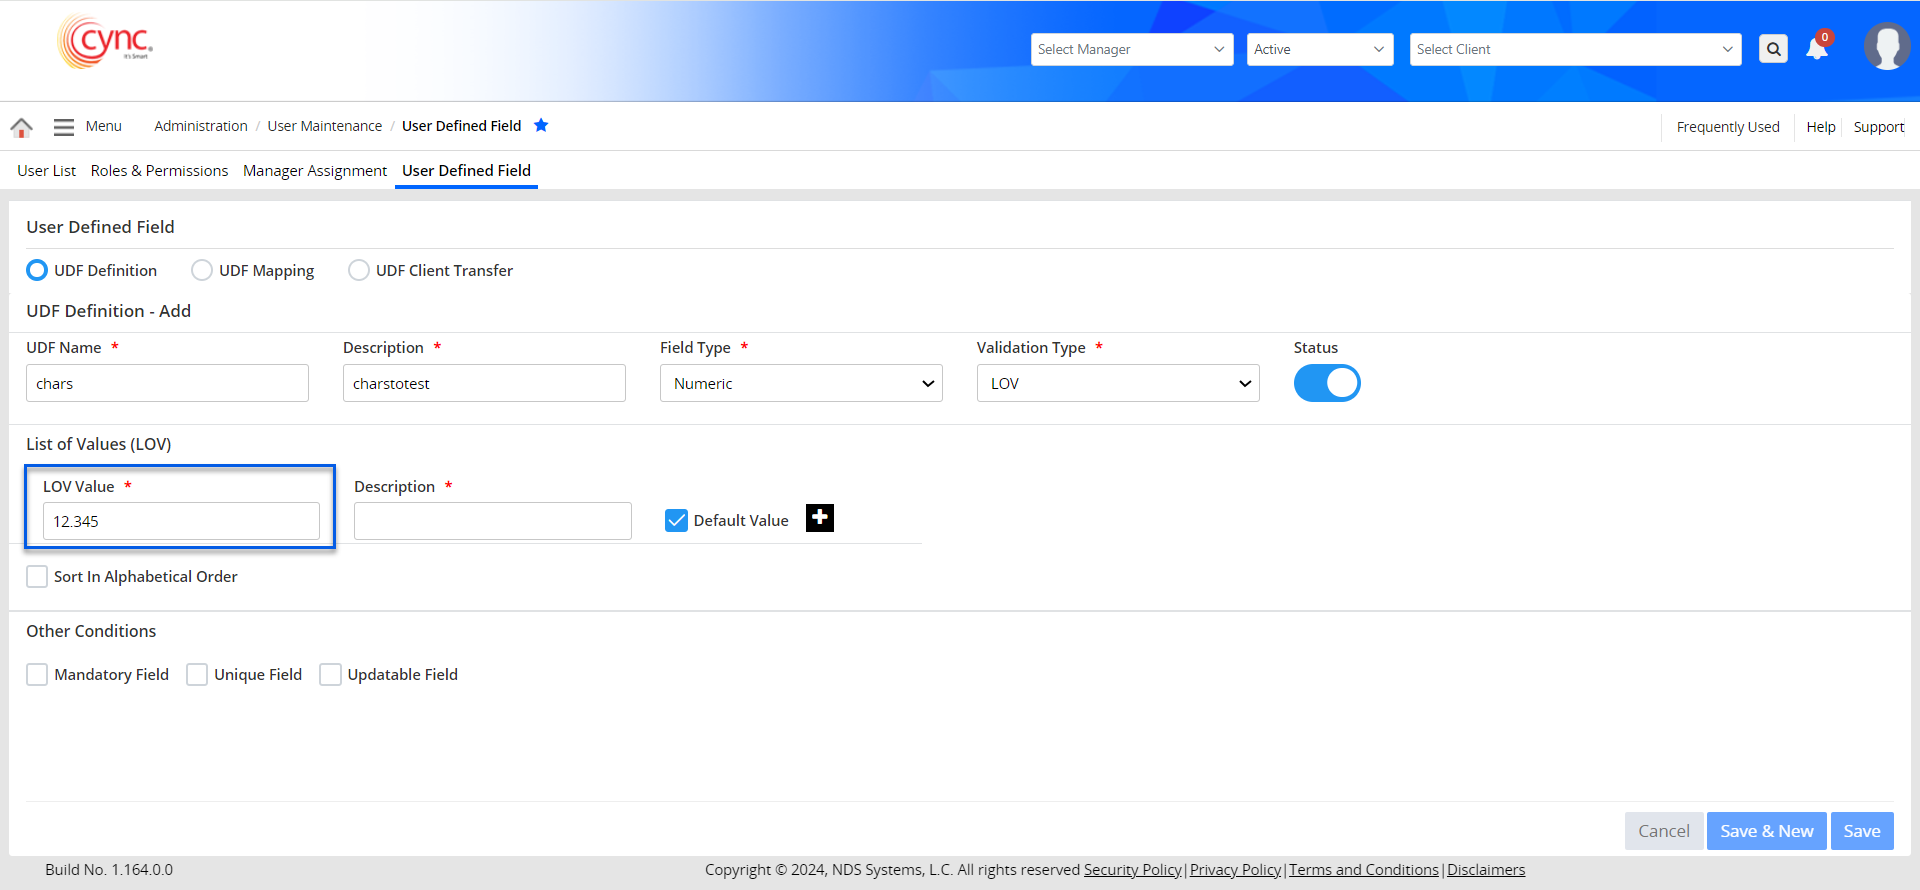
LOV Values can have decimal precision with more than 2 decimal places.
Refer to the screenshot:

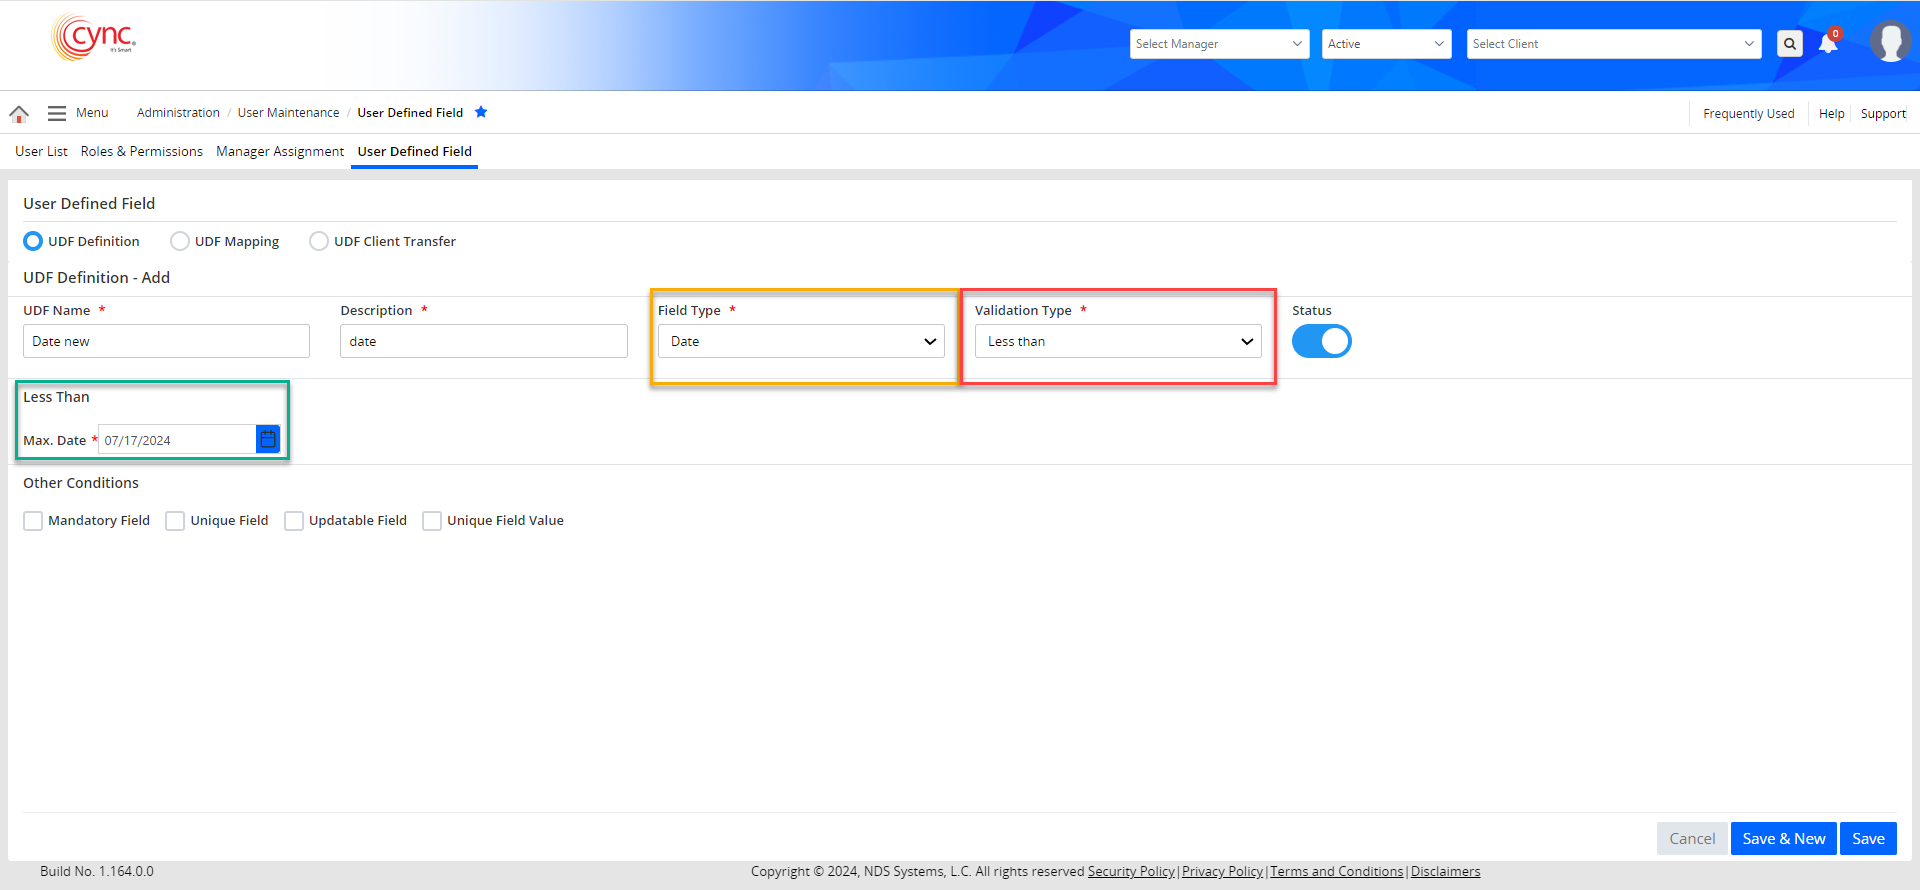
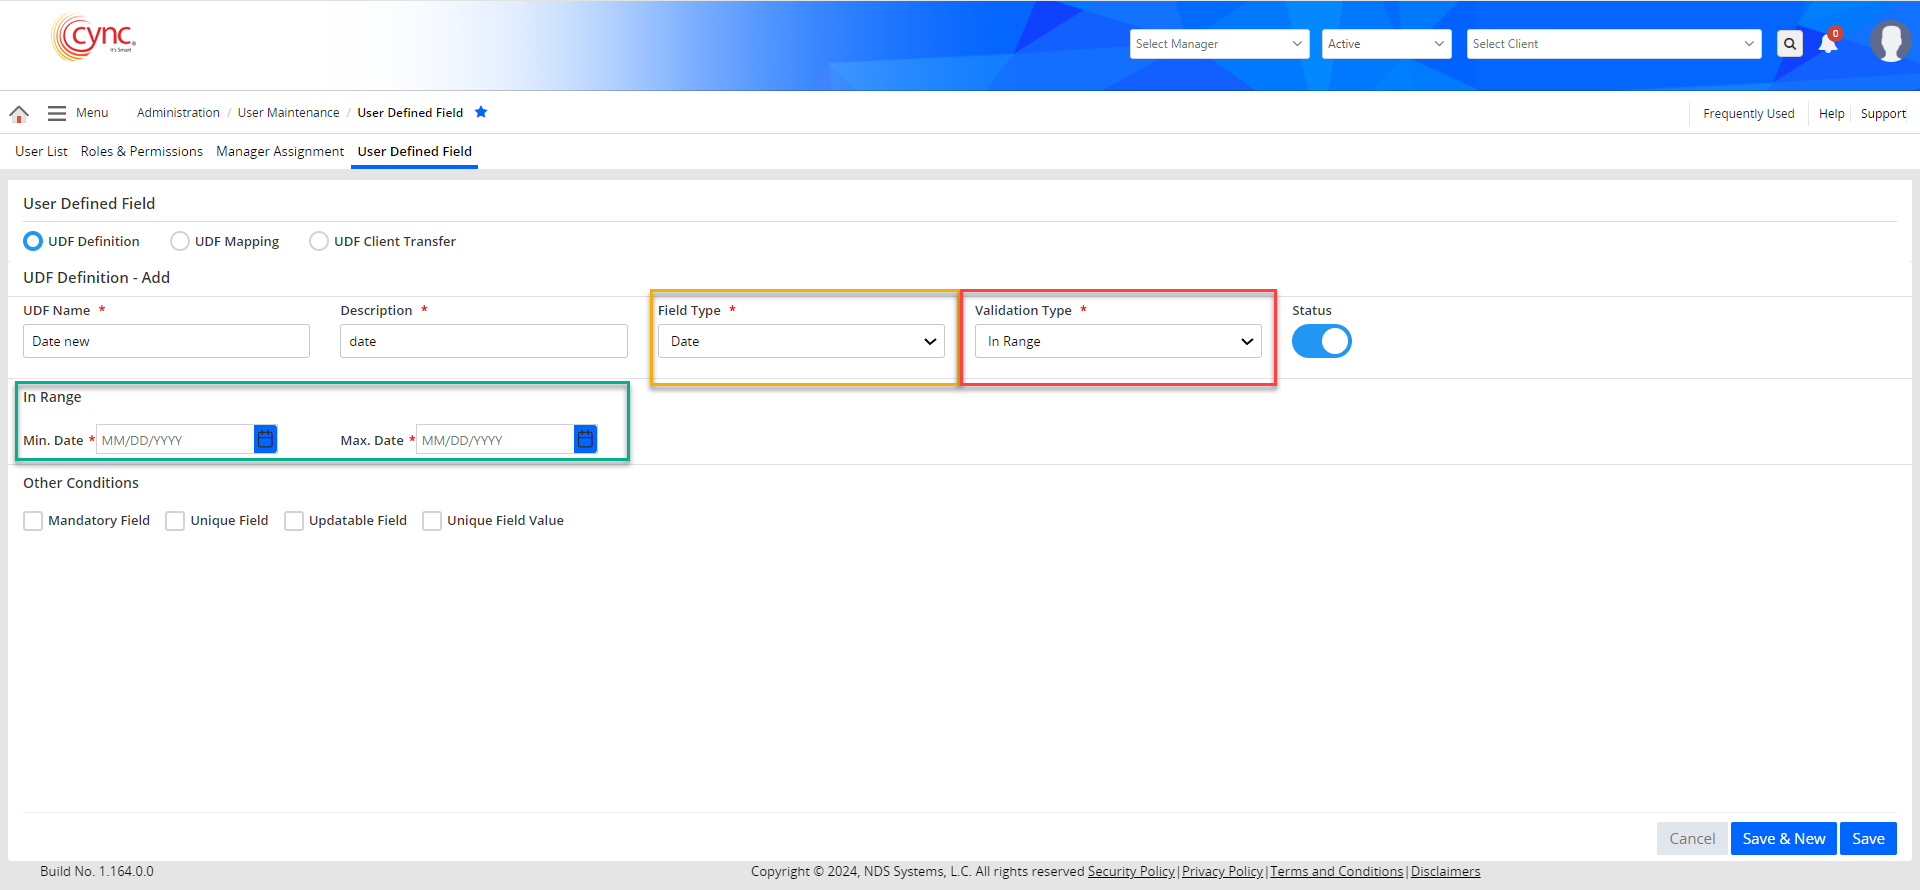
The defined Min. Date and Max. dates are exclusive!
Meaning, users can only enter the input dates lesser than or greater than the defined Min. Date and Max. dates.
Conflicting dates will produce the below error.
Greater than - “ The date inserted must be greater than (Date defined in UDF Definition page)”
Less than - “ The date inserted must be less than (Date defined in UDF Definition page)”
In Range - “ The date inserted must be within the date range (as defined in the UDF Definition page)”
Validation Type Fields:
Create UDF Definition
Perform these steps to create a UDF definition:
1. Go to Administration → User Maintenance → User Defined Field. Select the UDF Definition option.
2. Click the  button. UDF Definition - Add page appears.
3. In the UDF Name field, enter the UDF name.
4. In the Description field, enter the UDF description.
5. In the Field Type field, select the UDF field type.
6. In the Validation Type field, select the validation type. Several fields appear based on the validation type, you select.
7. Fill in the validation type fields as required.
8. Select the Status button to make the UDF active.
9. In the Other Conditions section, select the required checkbox as required.
10. Click the ![]() button to create the new UDF.
button to create the new UDF.
Other Conditions
Refer to the screenshot:
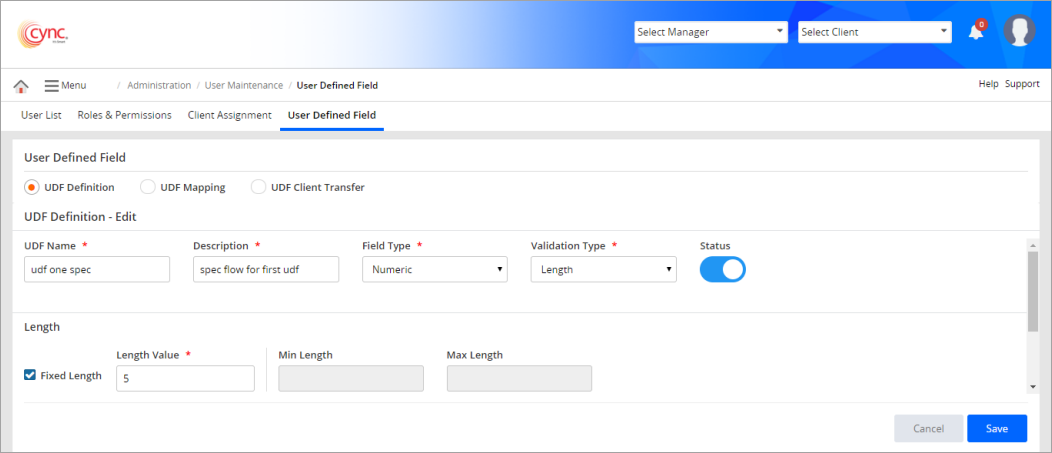
Edit UDF Definition
Perform these steps to edit a UDF definition:
1. Go to Administration → User Maintenance → User Defined Field. Select the UDF Definition option.
2. Click the  button. UDF Definition - Edit page appears.
3. In the UDF Name field, enter the UDF name.
4. Edit fields as required.
5. Click the  button. The UDF is edited.
Refer to the screenshot:
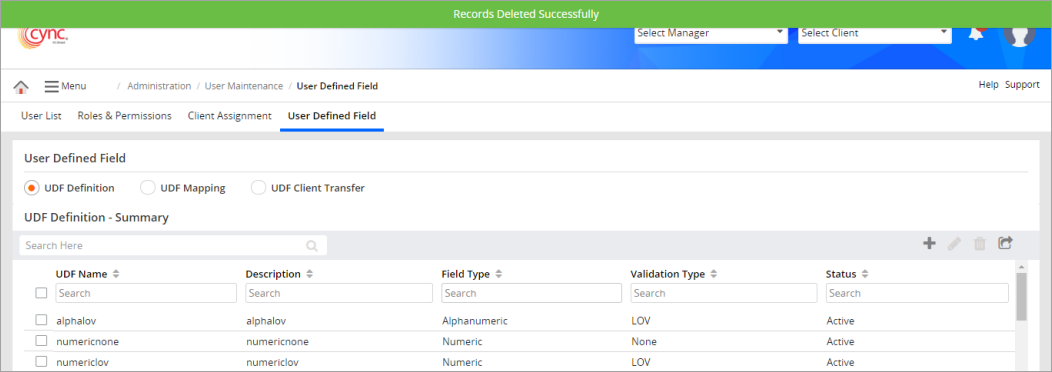
Delete UDF Definition
Perform these steps to delete a UDF definition:
1. Go to Administration → User Maintenance → User Defined Field. Select UDF Definition option.
2. Click the  button. A confirmation dialog box appears.
3. Click the  button to delete the UDF. A message appears.
4. Click the  button to cancel the deletion.
Refer to the screenshot:
Refer to the screenshot:
 You cannot delete a UDF if it is attached to a program.